Try followings tips to fix the problem:
- If you are using preset Photo – Customized, change resolution or aspect ratio.
- If you are using preset Video – Customized, change resolution or aspect ratio or framerate.
- Disable hardware encoding in app settings (only available on Android).
- If you are using sd card export, rename the folder ReShoot 360 to ReShoot 360 old on your sd card (only available on Android).
- Disable sd card export in app settings (only available on Android).
If you notice some “jumps” in your exported video then you can try the following tips to fix this issue :
- Disable hardware encoding in app settings (only available on Android).
- Disable battery saver or low power mode on your phone.
- Ensure that your phone battery is fully charged, you can plug your phone to ensure battery is ok.
- Close other apps before exporting your video, do not use your phone while app is exporting the video.
Try the following things :
- Ensure that you granted ReShoot 360 to access your storage, check in Android settings “Settings > Apps > ReShoot 360 > Permissions”.
- Disable “360°” filter in the top-right menu.
- Ensure that your 360° media is in folder “Movies” or folder “Pictures”.
- If you plug a SD card, ensure to restart a scan to refresh the media list.
If you still cannot select your 360° media, go finding your 360° media with your camera app or with Photos albums, it depends on the 360° camera you have. Use “Share” button and select “ReShoot 360” in the horizontal list at the bottom.
Try the following things :
- Ensure that you granted ReShoot 360 to access your medias, check in iOS settings “Settings > Privacy > Photos > ReShoot 360”.
- Disable “360°” filter in the top-right menu.
If you still cannot select your 360° media, you can copy your media directly in ReShoot 360 app folder, here are 2 solutions to do it from your iOS device or from your Mac.
Solution 1 : Copy your 360° media from your iPhone or iPad
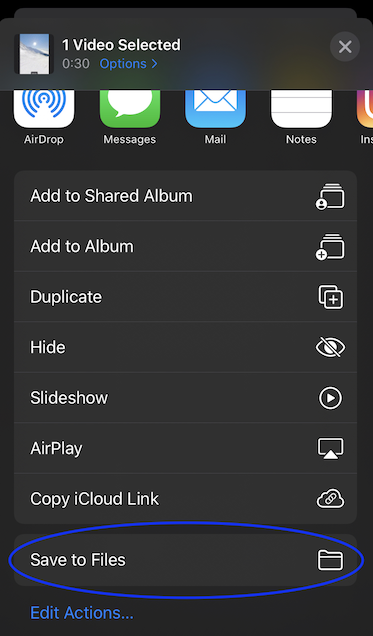
- Go finding your 360° media with your camera app or with Photos app.
- Use “Share” button
 and select “Save to Files” (scroll down if you don’t see it).
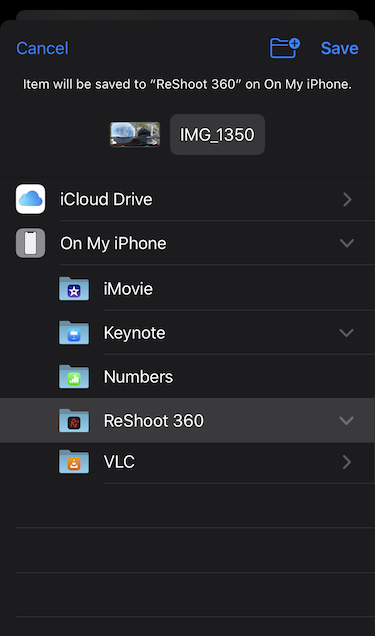
 - Select “On My iPhone > ReShoot 360” and click “Save“.
Restart a scan and your 360° media should appear on top of the list.
Solution 2 : Copy your 360° media from your Mac
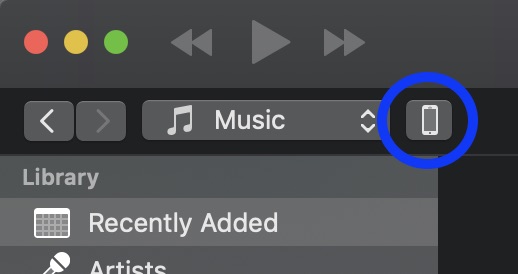
- Connect your iOS device to your Mac with USB and open iTunes.
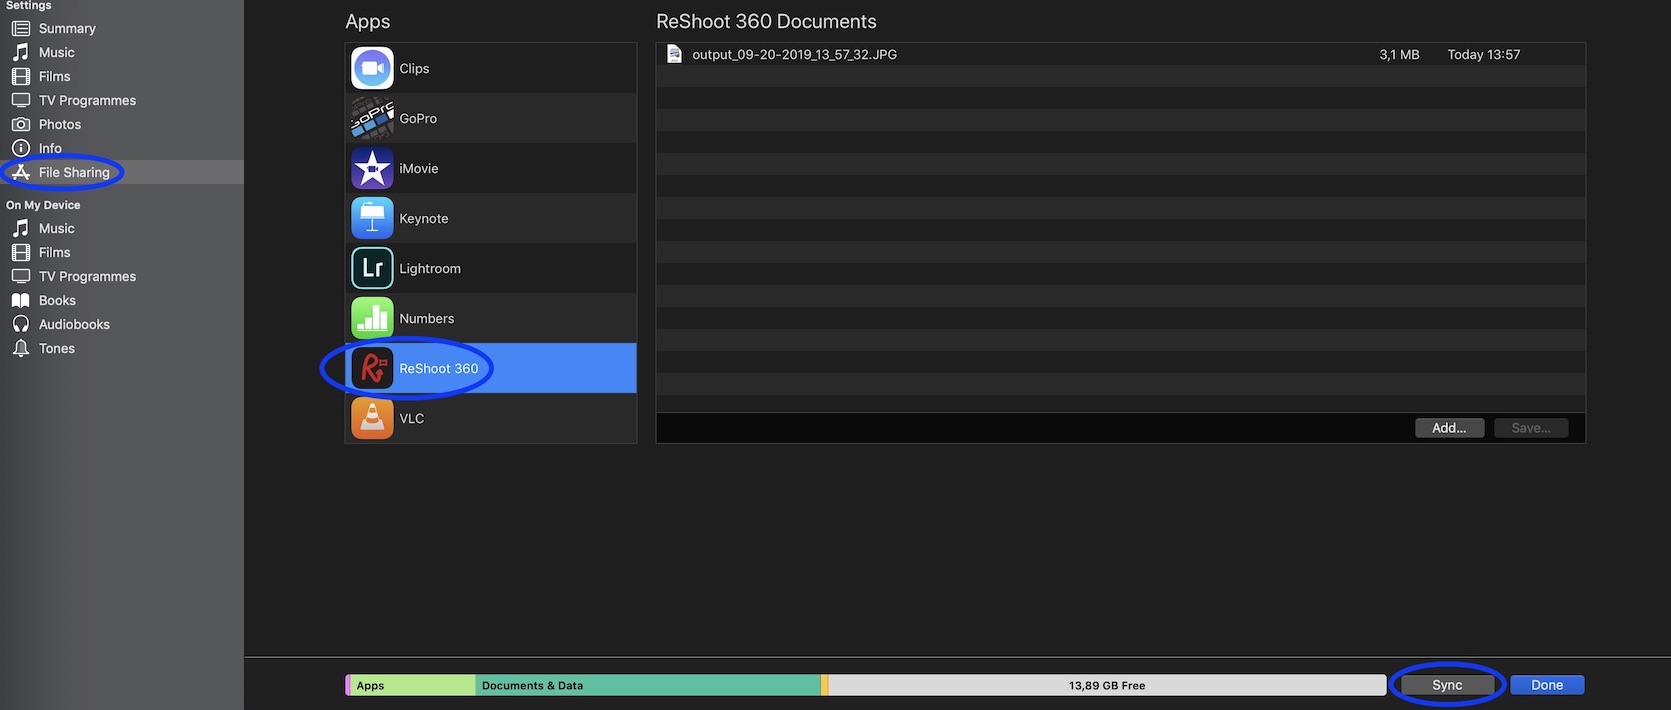
- In the top-left corner, click on the phone button, select “File Sharing” in the left pane, select “ReShoot 360” in the “Apps” list.
- Then you will see the list of “ReShoot 360 Documents”, drag and drop your 360° media here or click on the button “Add…”.
- Once it is done, ensure to click on “Sync” button at the bottom-right corner, and then click on “Done” button.
Restart a scan and your 360° media should appear on top of the list.
Only “360°” videos or photos are supported, also called “360 degree” or “spherical”.
For now, ReShoot 360 supports only the 360° format equirectangular.
Use the photo editor to create a photo from a 360 photo or a 360 video.
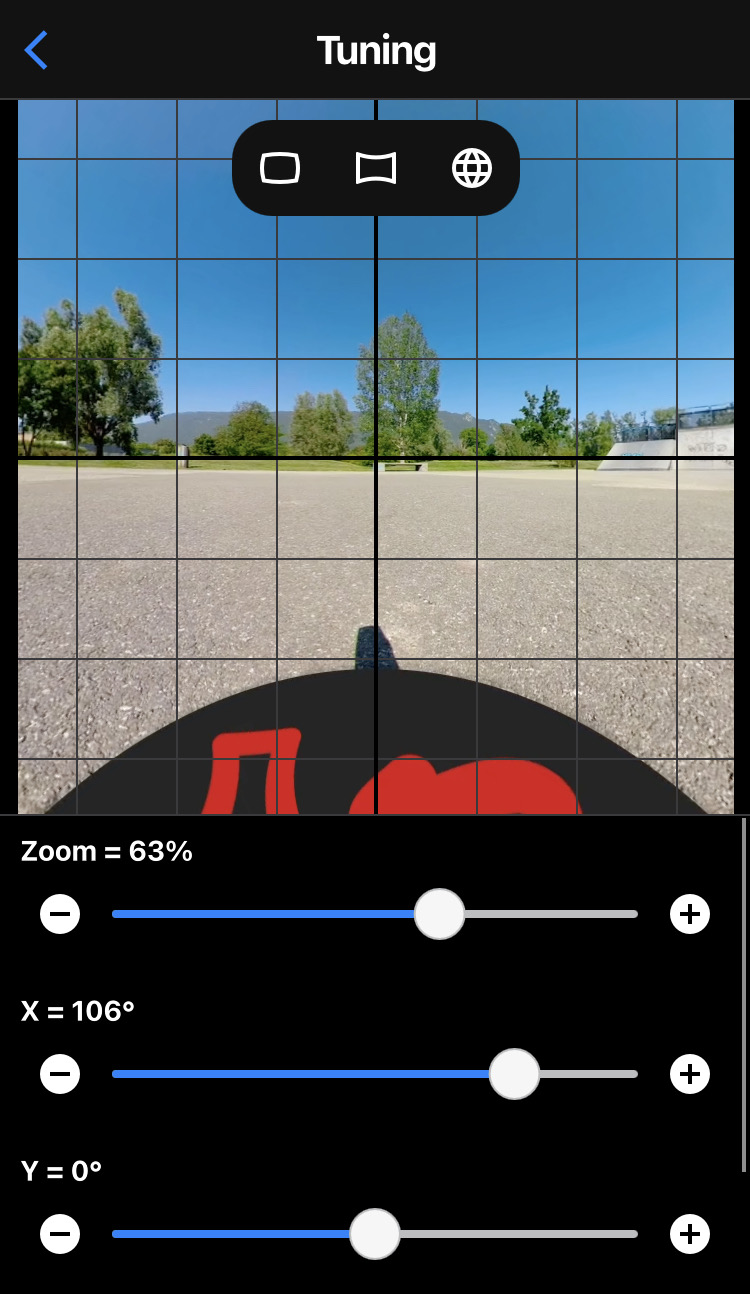
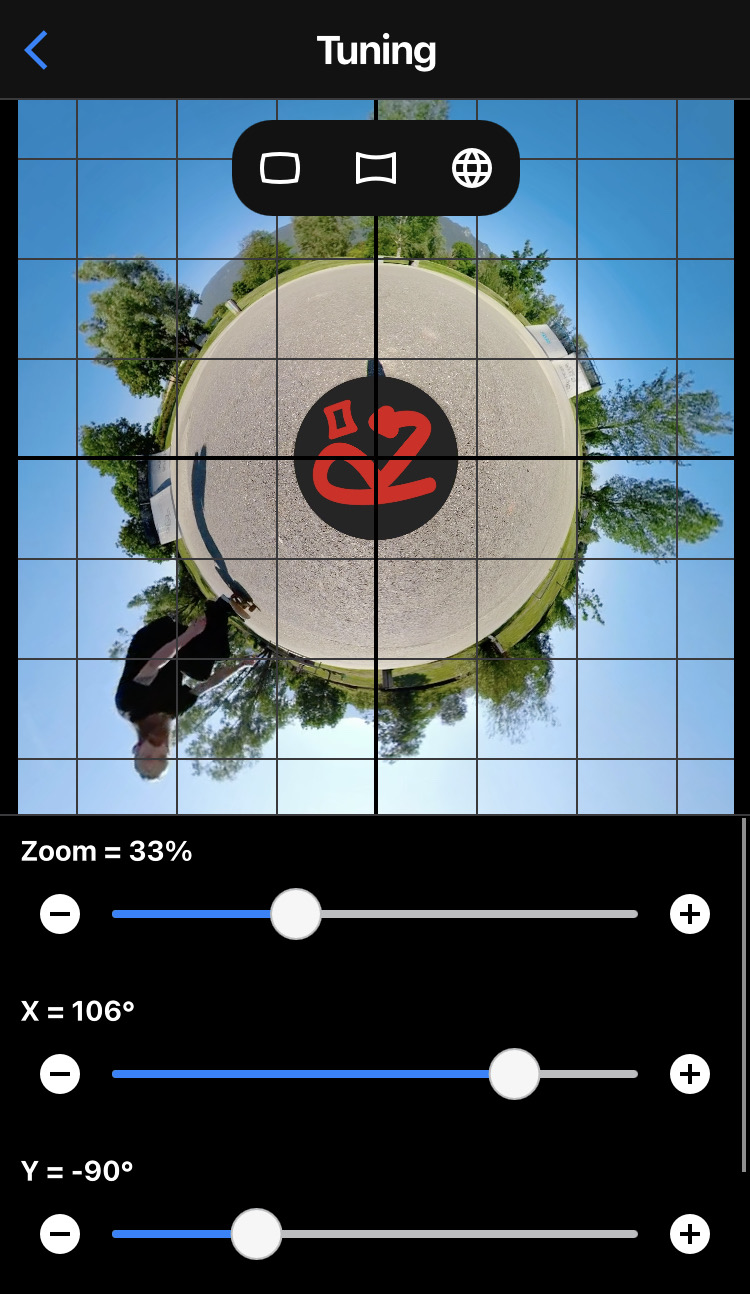
Tuning
The tuning screen is accessible through the menu.
Use sliders to change camera parameters : Zoom, X, Y, Z.
Buttons – and + allow to set more precisely the value.
Buttons on the top of the live preview are shortcuts to automatically set camera parameters : Normal, Wide Angle, Little Planet. 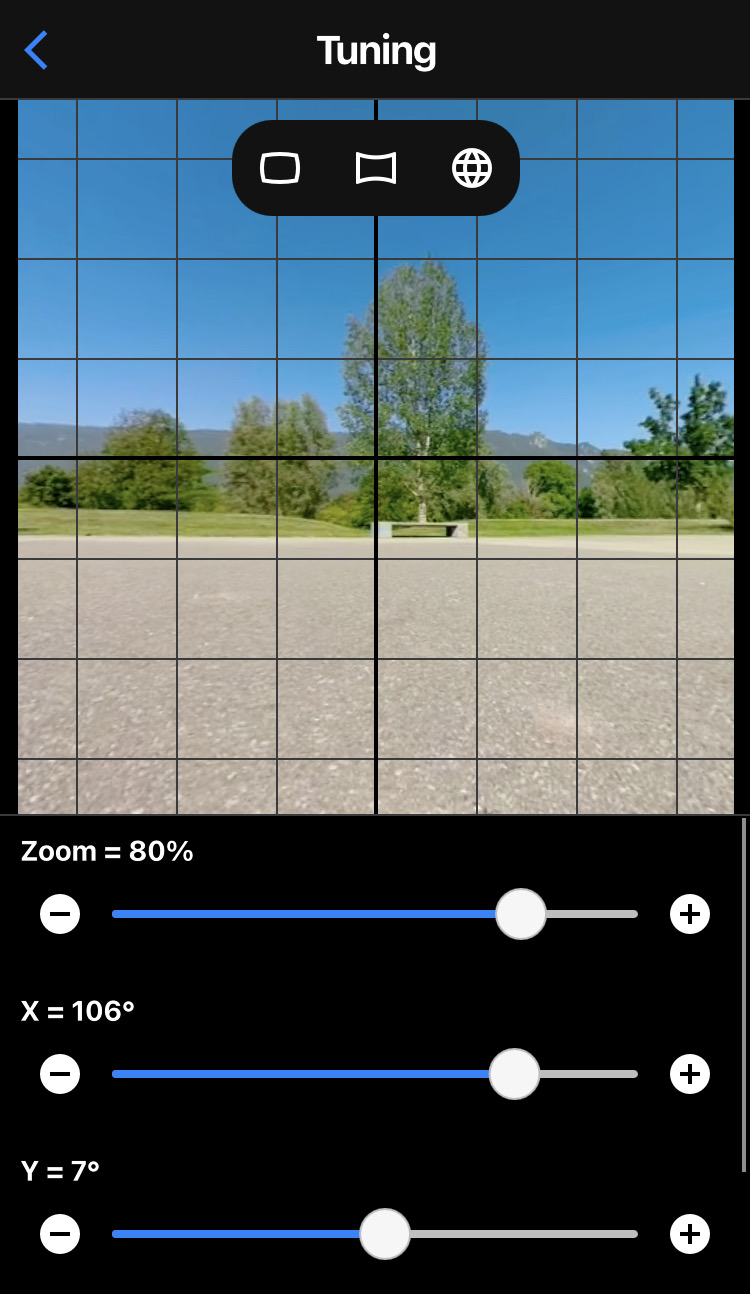
Use the video editor to create a video from a 360 photo or a 360 video. Control the video flow by adding keyframes. Customize transitions between keyframes. Add special effects to your video.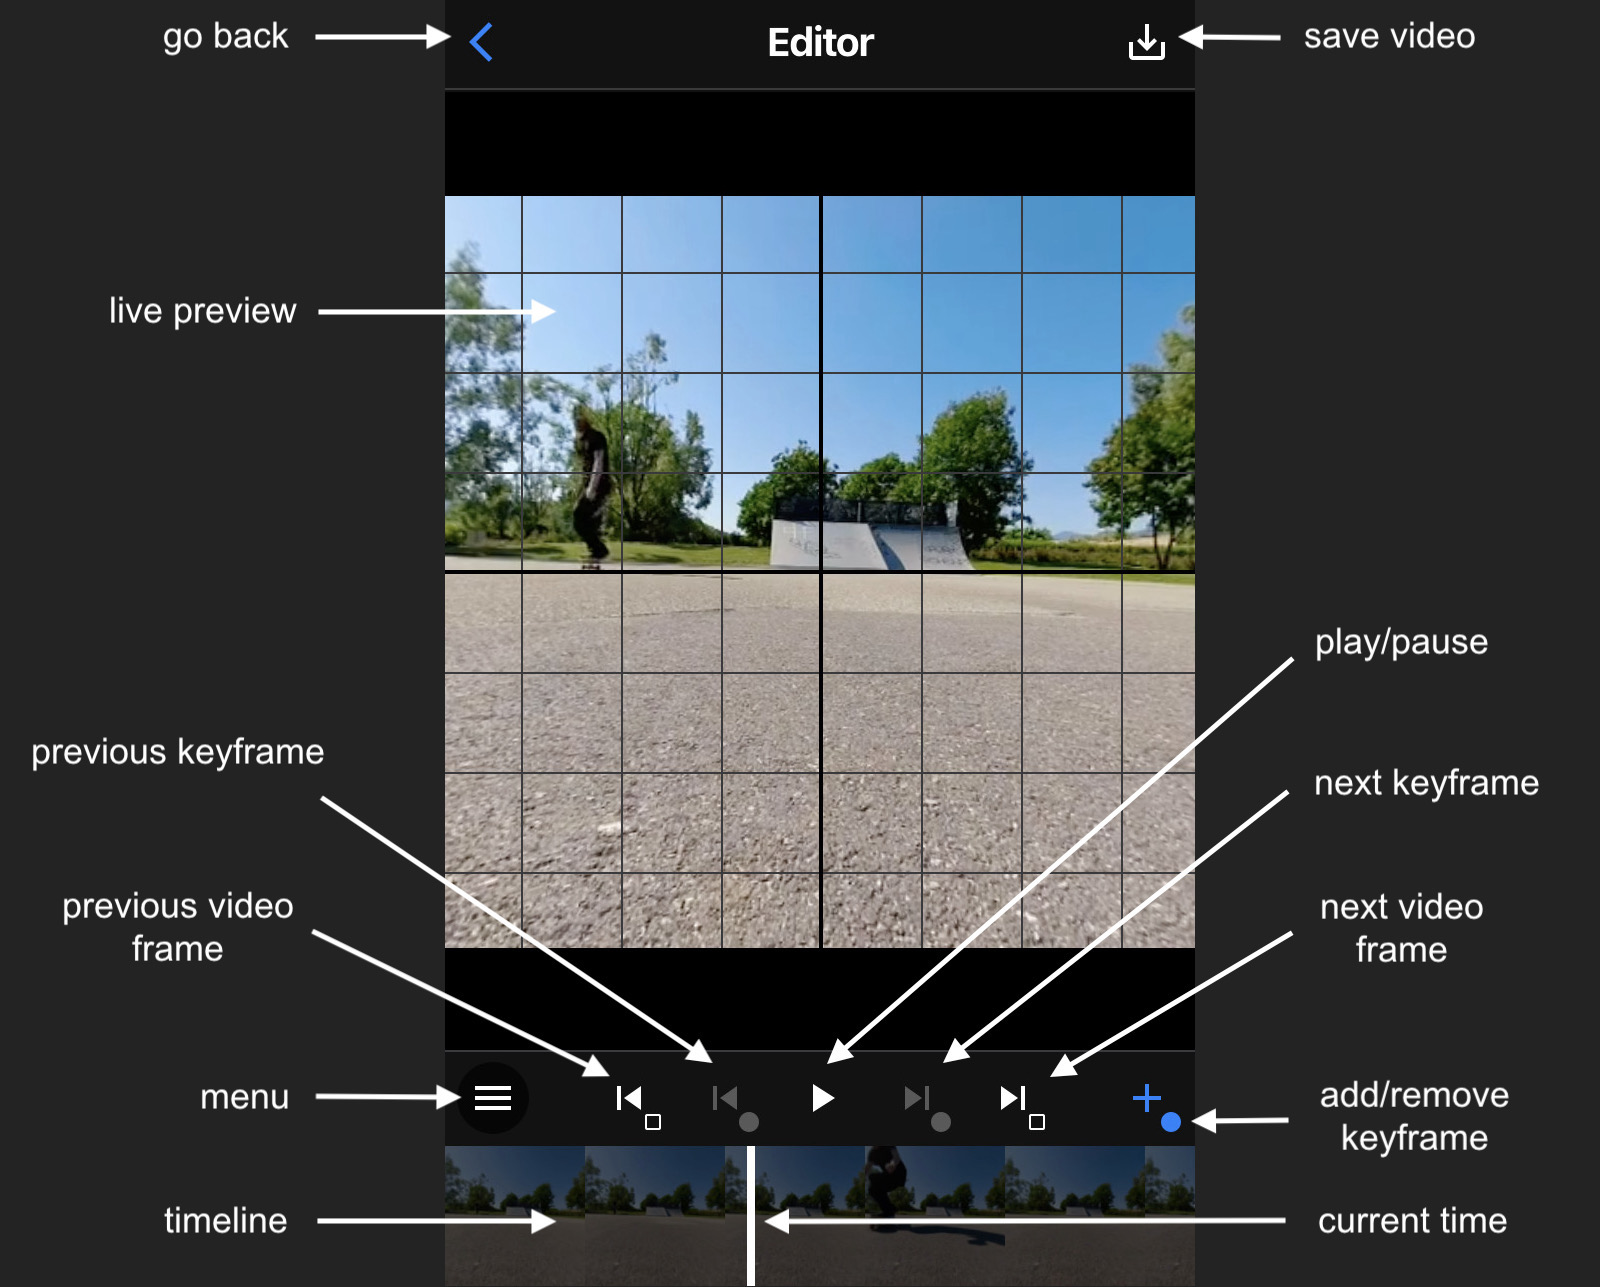
Timeline
The timeline shows thumbnails of your video editing.
Tap anywhere in the timeline to change the video current time. You can also drag the current time bar to change the video current time.
Change the timeline zoom by using zoom buttons in menu.
Change the thumbnail width by pinching in the thumbnail.
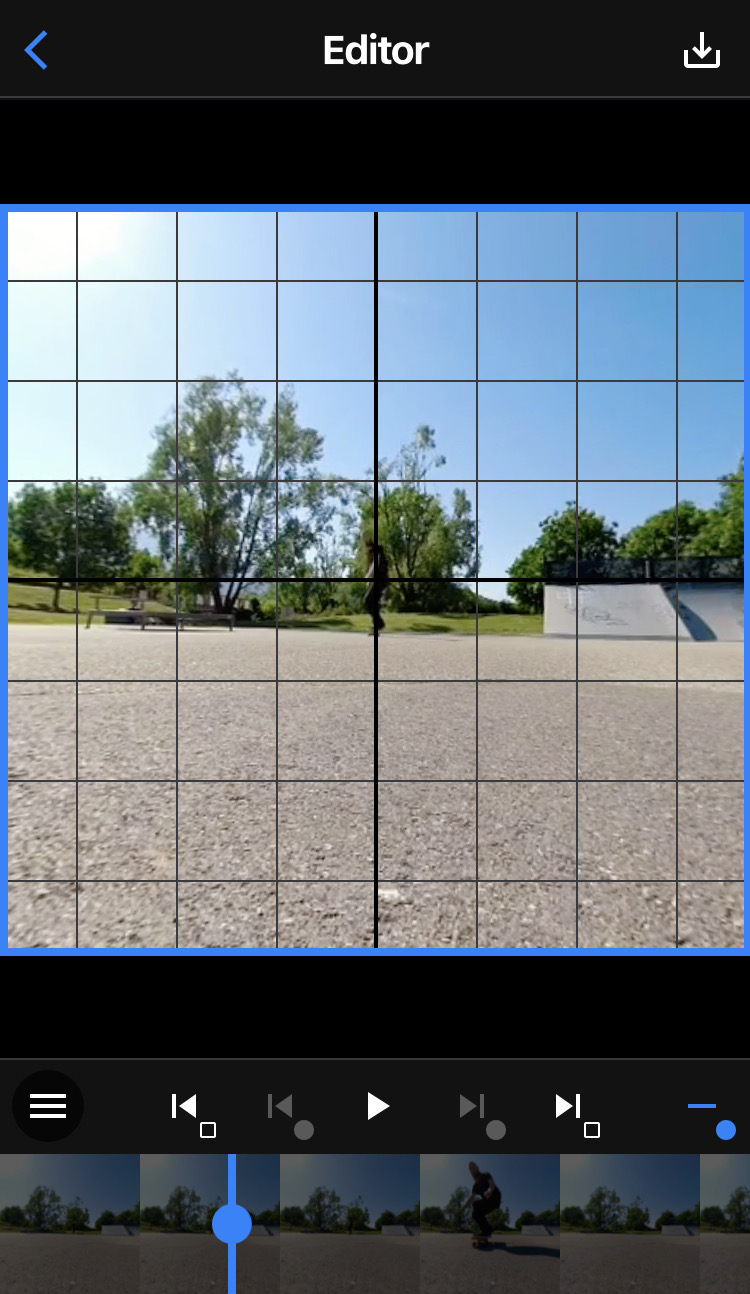
Keyframes
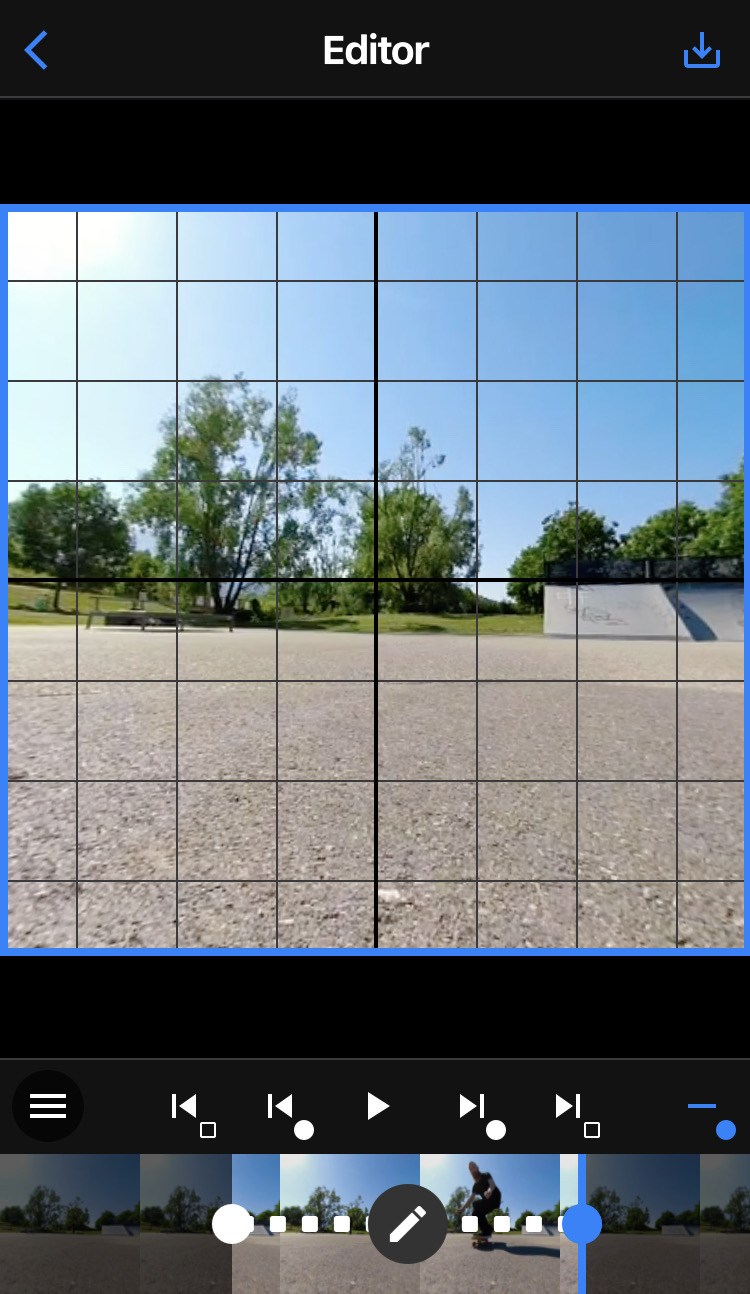
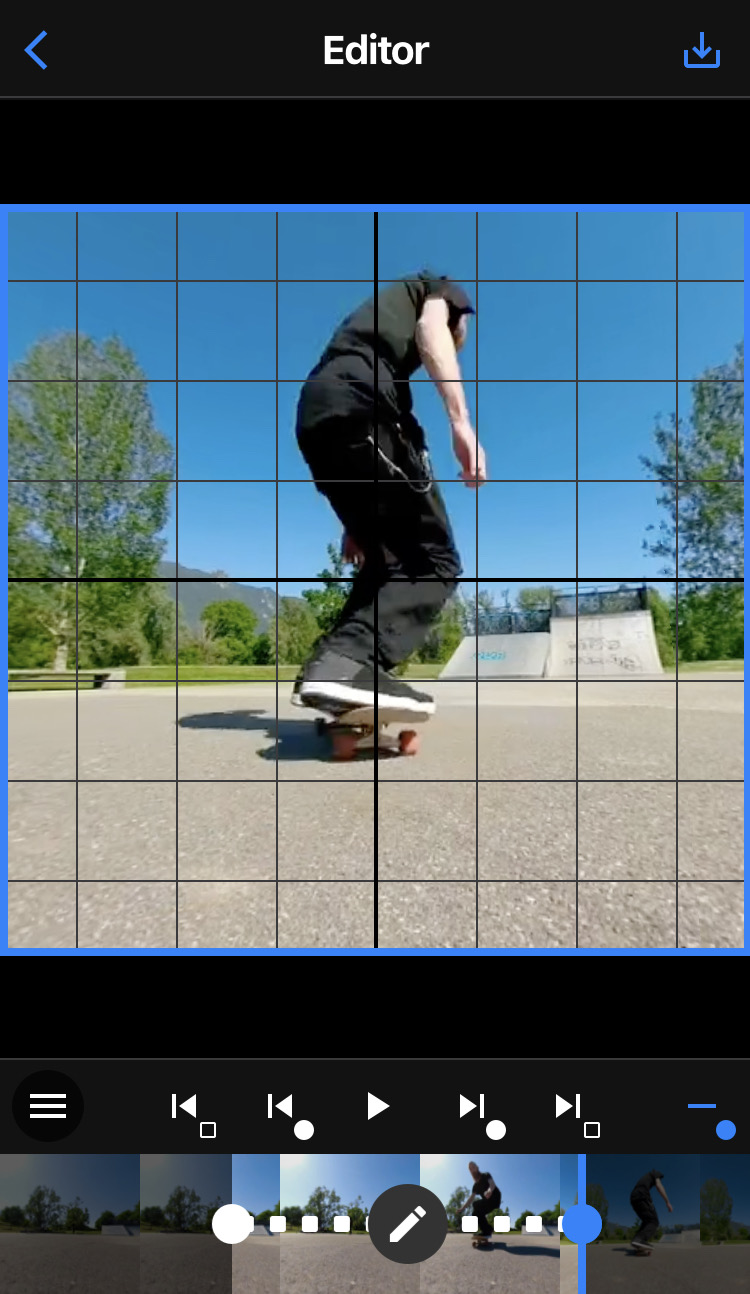
Add a first keyframe to start your video flow.
The keyframe appears as a white circle in the timeline.
The keyframe appears as a blue circle when you are editing the keyframe, also the current time bar and the live preview border become blue.
Edit the keyframe by changing camera parameters, you can either touch and drag the live preview or go to Tuning screen for precise control.
You can use previous/next keyframe buttons to jump between keyframes or you can tap on the keyframe white circle to jump on it.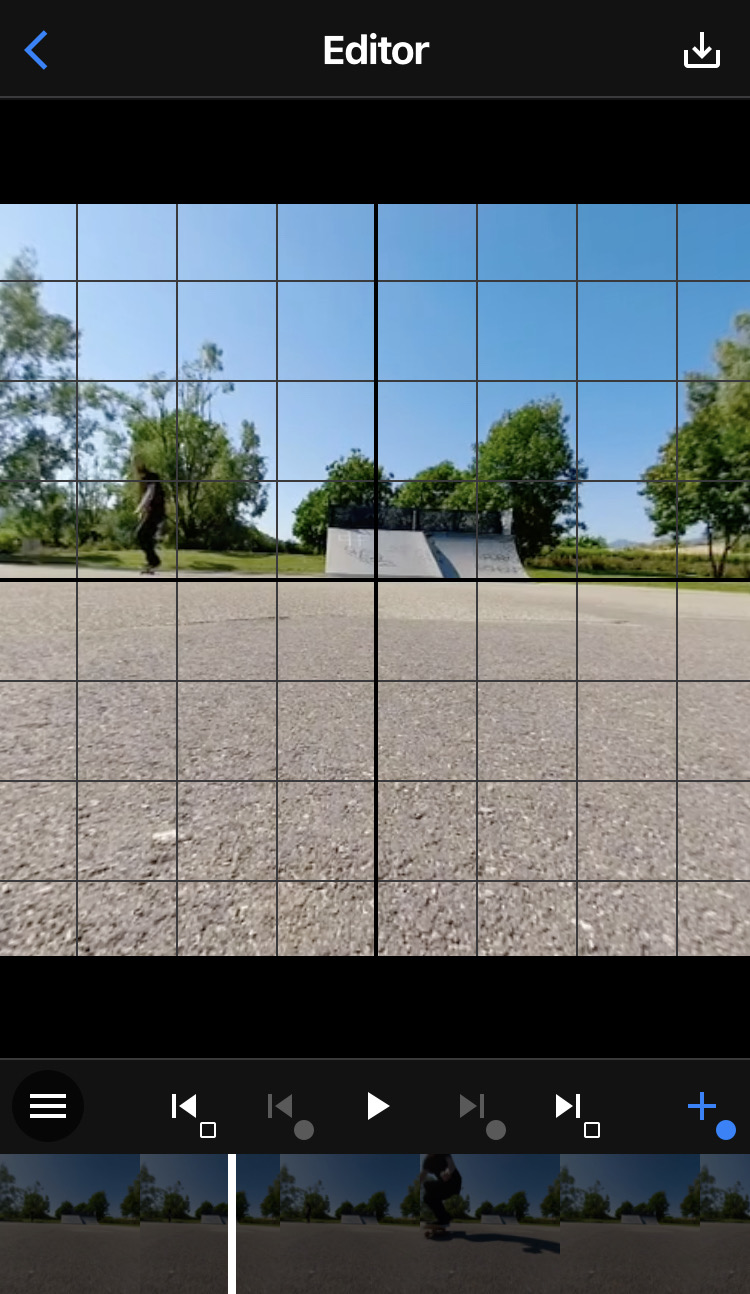
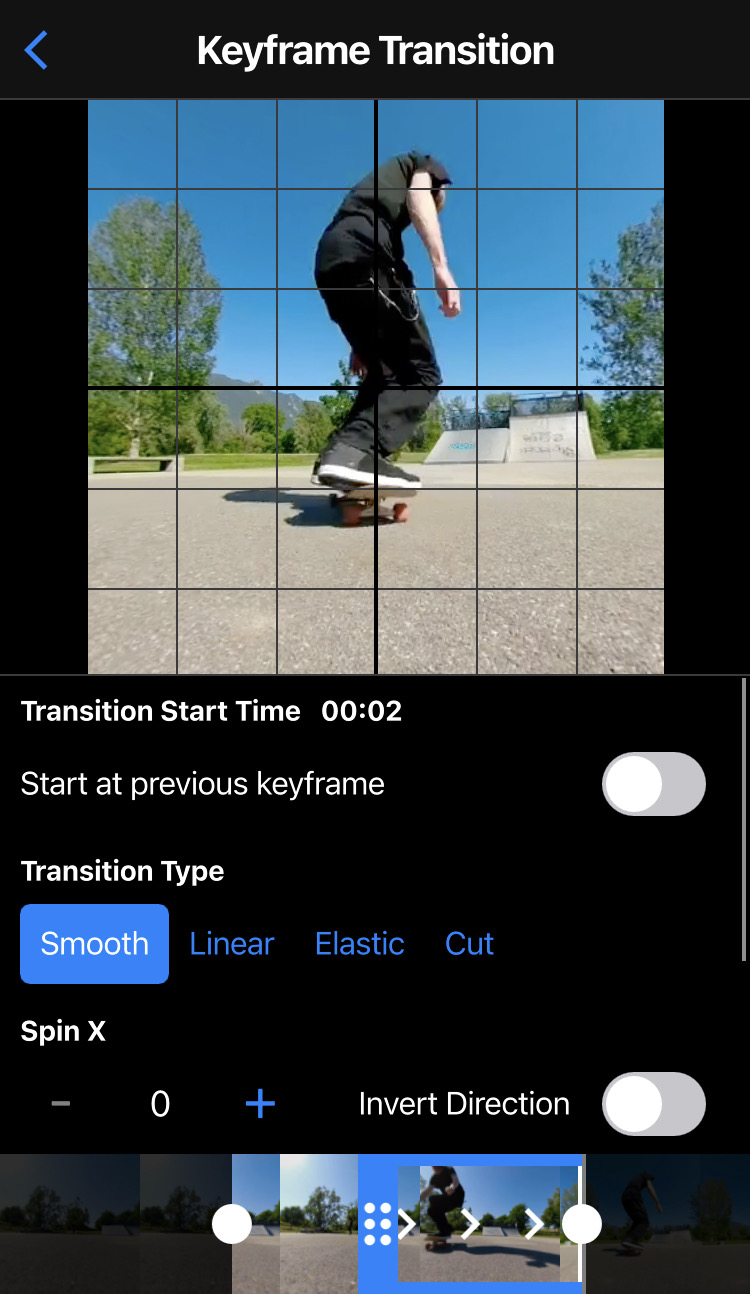
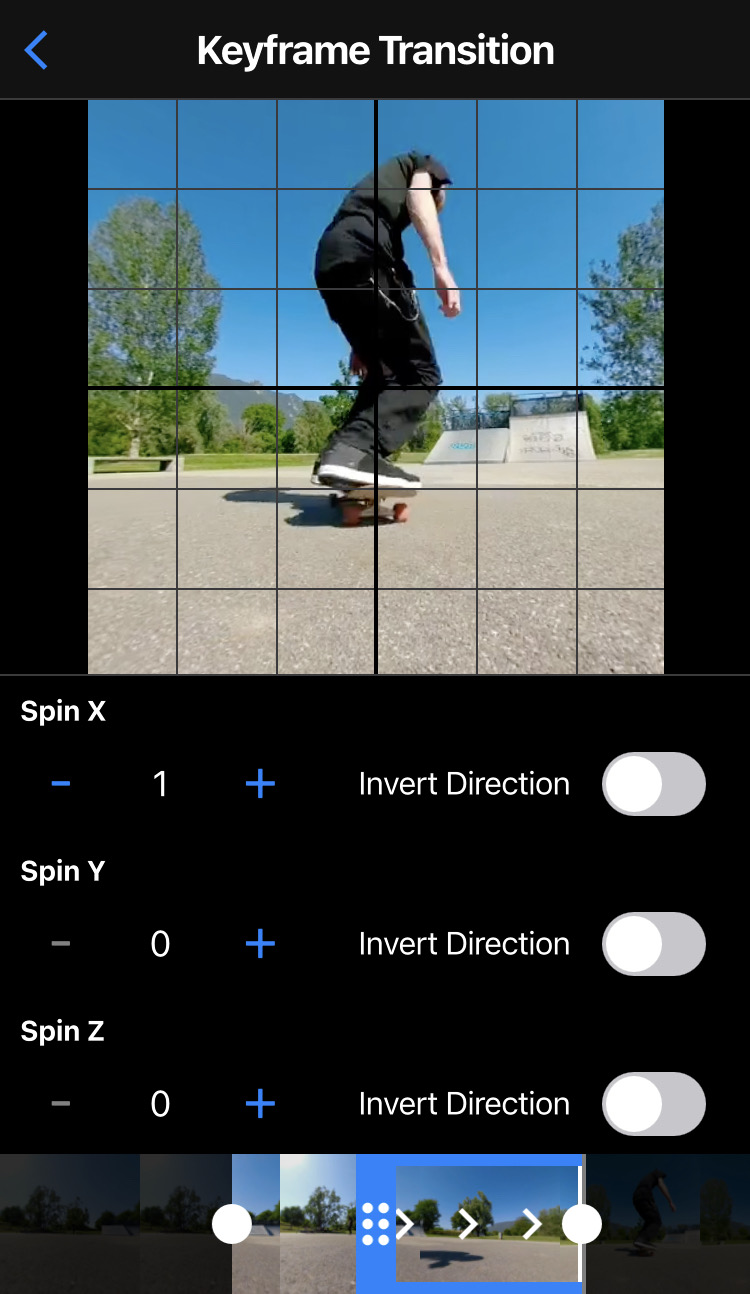
Transitions
Edit how camera transition is made between 2 keyframes with the edit button in the timeline.
Choose if the transition starts immediately at previous keyframe or if the transition starts after a delay. Drag the blue landmark in the timeline to set when the transition starts.
Set the transition type within the 4 possible values : Smooth, Linear, Elastic, Cut (no transition).
You can add a camera spin in the transition. Choose on which axis you want to make the spin. Set how many spins you want. You can also invert the spin direction.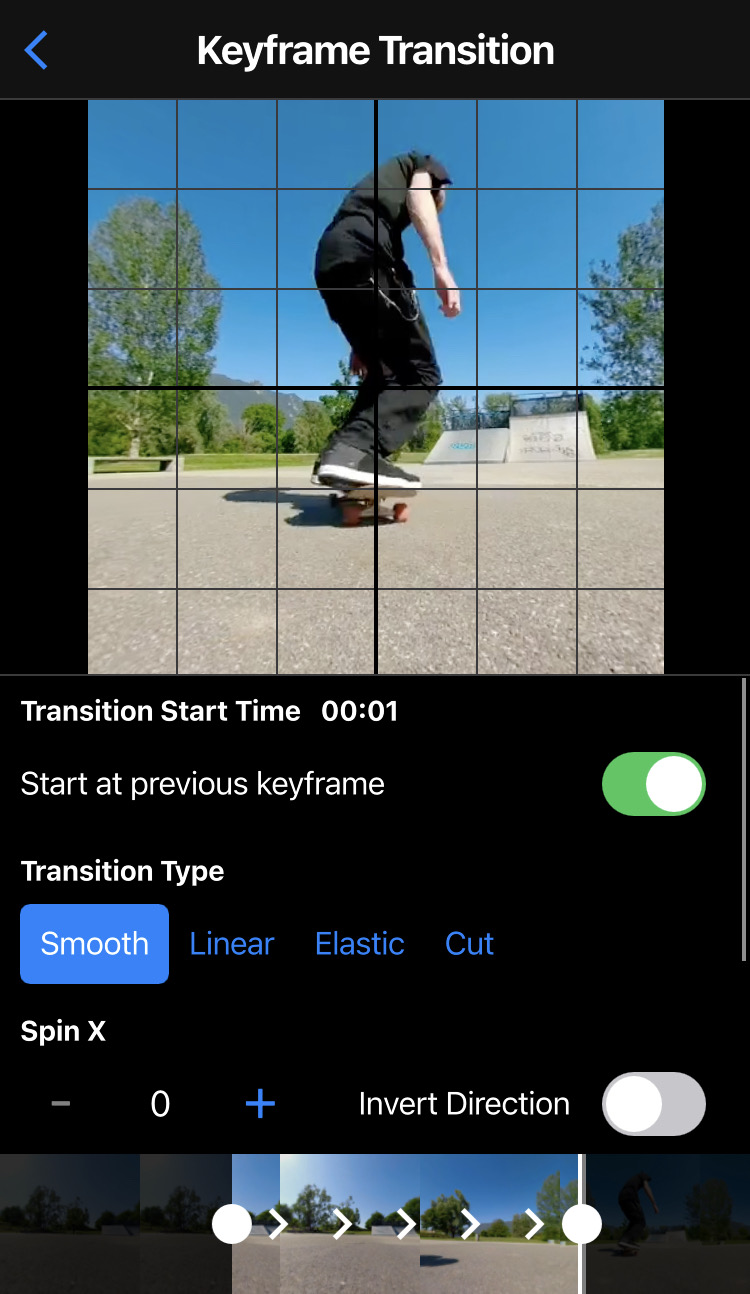
Tuning
The tuning screen is accessible through the menu.
Use sliders to change camera parameters : Zoom, X, Y, Z.
Buttons – and + allow to set more precisely the value.
Buttons on the top of the live preview are shortcuts to automatically set camera parameters : Normal, Wide Angle, Little Planet.


